The Interior Designer’s Guide to Picking the Best 3D Rendering Software (With Expert Tips)
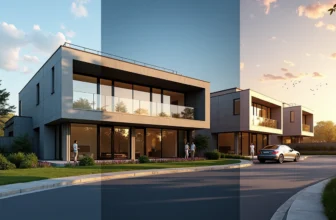
The rise from traditional sketches to the best 3D rendering software for interior design has changed how professionals bring their creative vision to life. Today’s digital world shows that 3D visualization helps clients make better decisions and cuts down on project revisions that can get pricey.
Design professionals now depend on advanced 3D rendering tools that pack everything from drag-and-drop floor planning to photorealistic visualizations. On top of that, features like live rendering, AI-assisted layouts, and cloud collaboration have become standard in top platforms. The right interior design 3D rendering software helps designers share ideas clearly, attract more clients, and reduce project delays.
You might be starting with accessible options like Planner 5D or looking at professional tools like Chief Architect and Lumion for detailed workflows. Your choice of 3D interior design program makes a difference. This piece gets into the most practical 3D rendering software interior design professionals use today. It helps you pick the right tool based on your needs, skill level, and goals.
Understanding Your Interior Design Needs
You need a clear grasp of your interior design requirements to pick the right 3D rendering software. The best way to find software that will boost your workflow is to examine your project needs, skill level, and goals before making any investment.
Define your project types and goals
Interior design projects come in many shapes and sizes, from home remodels to commercial spaces. You should first define your typical projects and what you want to achieve. Each project needs different tools and technical approaches.
Common interior design project types include:
- Residential renovations and new constructions
- Commercial spaces (offices, retail, hospitality)
- Conceptual design exploration
- Marketing and presentation-focused visualization
“The keypoint of any design is esthetic appeal, compliance with functional needs, and the ability of people to feel comfortable,” notes industry experts. Clear project parameters help you narrow down software options that line up with your work. You should document current conditions, set original schedules, and create budget projections before picking rendering tools.
Think about whether you need software mainly for client presentations, design exploration, or technical documentation. This assessment will narrow your software options to those that excel in your priority areas.
Assess your skill level and team size
Your experience with 3D software and team makeup determines which interior design 3D rendering software fits best. Beginners might prefer user-friendly platforms with drag-and-drop interfaces over complex professional suites.
Team size plays a big role in software selection. Small teams often want streamlined collaboration features. Larger organizations need enterprise-level solutions with robust project management capabilities. You should also think about whether you’ll outsource work or handle everything in-house. This affects your licensing needs and technical requirements.
“Choosing the right 3D rendering software is one of the most important decisions an interior designer can make,” according to industry professionals. Beginners should start with available tools like SketchUp with V-Ray. Intermediate users might like Blender, while professionals often choose 3ds Max with Corona.
Decide between conceptual vs. photorealistic output
Your choice between conceptual visualization and photorealistic rendering is vital. This decision shapes which interior design rendering software serves you best.
Conceptual visualization prioritizes:
- Rapid iteration and design exploration
- Simplified representation of space and forms
- Quicker rendering times and lower hardware requirements
Photorealistic rendering creates “stunning images that closely resemble real-life scenes by simulating physical light interactions.” This approach needs advanced software tools to simulate lighting, textures, and materials accurately.
Conceptual visualization works well for early-stage planning and client feedback. It provides enough detail and allows quick changes. Photorealistic rendering becomes essential for final presentations and marketing materials where emotional effect matters. “Photorealistic imagery significantly enhances the communication of design concepts and marketing strategies, making them more relatable and convincing to potential clients.”
These three key areas—project types, skill level, and desired output—will help you learn about which 3D interior design programs match your professional needs and workflow requirements.
Essential Features of the Best 3D Rendering Software
Software’s core capabilities make the difference between good and exceptional interior design visualization. The best 3D rendering software for interior design stands out through several key features that set professional-grade solutions apart from simple visualization tools.
Real-time rendering capabilities
Real-time rendering has changed how interior designers work by giving instant visual feedback. Traditional pre-rendering could take hours. Now, real-time rendering produces 20-120 frames per second, usually delivering 30 or 60 FPS for smooth visualization. Designers can make quick adjustments and try different design options right during client meetings.
A remarkable 98% of designers who use real-time rendering say it improves client communication. Instant visualization helps catch potential design flaws before construction starts, which saves money on fixes later. Designers without specialized technical backgrounds can now turn CAD models into immersive 3D environments with just one click.
Material and texture customization
Realistic material representation is the foundation of convincing interior design visualization. The best interior design rendering software comes with extensive material libraries and powerful customization options.
The best tools let designers:
- Apply materials directly onto 3D objects
- Create custom textures with precise physical properties
- Test different finishes to assess how materials interact with lighting
- Export compatible texture maps to use across platforms
Advanced platforms now use AI-assisted material application that suggests appropriate textures based on object geometry and lighting conditions. Premium software often includes big built-in libraries—Chaos, for example, provides over 1,000 pre-made materials ready to use in interior design projects.
Lighting simulation and camera control
Light shapes how we see spaces. Professional rendering software simulates ground lighting physics through techniques like ray tracing and global illumination.
Key lighting capabilities should include:
- Light layering with multiple sources and control zones
- Accurate color temperature (CT) and color rendering index (CRI) simulation
- Daylight integration with time-of-day settings
- Standards-compliant calculations for technical accuracy
Camera control lets designers craft compelling visual stories. The best software offers user-friendly camera manipulation—panning, zooming, orbiting, and tilting—to get the perfect composition. Advanced camera features like depth of field, motion blur, and lens effects add photographic realism and help people understand spatial relationships better.
Cross-platform compatibility
The best interior design 3D rendering software works naturally across different operating systems and fits with other design tools. This compatibility keeps workflows smooth and makes shared work easier between team members using various devices.
Industry leaders now support open standards like ANARI that make development easier across platforms without needing low-level graphics code. This standardization helps rendering engines deliver sophisticated features like ray tracing and global illumination on any system.
The software needs to work with modeling tools like Revit, SketchUp, Rhino, and ArchiCAD. Designers can work straight from their architecture projects without disrupting file conversions. Cloud rendering utilizes unlimited computing power, creating complex visualizations faster than desktop systems.
Comparing the Best Interior Design 3D Rendering Software
Selecting the right visualization tool requires matching software capabilities with your specific needs. You’ll find specialized options for every skill level and project requirement in 3d interior design.
Planner 5D vs. Homestyler – For beginners
Planner 5D gives you a user-friendly platform that beginners can use without tutorials. This browser and mobile-based tool comes with AI-assisted layouts, live updates, and a free version plus optional paid upgrades. Homeowners and decorators will find its drag-and-drop functionality and automated features perfect for visualizing renovations.
Homestyler brings you a browser-based design application that focuses on layout planning with simple interior rendering. The platform has a complete library of real-life furniture brands, so designers can create with authentic products. Both platforms let you do 3D walkthroughs, but Homestyler’s rendering quality stays basic compared to premium options.
Lumion vs. Twinmotion – For fast presentations
Lumion stands out with live rendering, excellent lighting effects, and a big library of furniture, materials, and lighting assets. Professional designers prefer it for quick, impressive results at USD 749.00/year for the Standard version. The software gives you superior customization options and extensive post-processing effects.
Twinmotion delivers live rendering through a clean, drag-and-drop interface at USD 445.00 for commercial use. The software has VR support, live navigation, and comes free for personal use. Designers who often revise their models value Twinmotion’s live sync feature that updates changes from 3D modeling software instantly.
3ds Max + V-Ray vs. Blender – For photorealism
3ds Max with V-Ray sets the industry standard for photorealistic interior visualization. This powerful combination (USD 235.00/month for 3ds Max and USD 60.00/month for V-Ray) gives you unmatched realism and material control. Yes, it is essential for marketing-grade interior visuals despite its steep learning curve.
Blender gives you a free, open-source 3D suite with the powerful Cycles rendering engine. Many professionals employ it for its flexibility and realistic output, though it wasn’t specifically designed for interiors. The software lets you work with advanced customizable shaders, lighting, and material options but needs more initial setup than specialized tools.
Chief Architect vs. Revit – For full-scope design
Chief Architect (USD 199.00/month) specializes in residential design with advanced BIM features, parametric modeling, and solid built-in rendering. Kitchen design professionals love its manufacturer’s kitchen/bath product libraries for residential projects.
Revit (USD 350.00/month) serves as a complete BIM platform that becomes powerful for accurate interior renderings when paired with plugins like Enscape or V-Ray. The software excels at architectural accuracy and data-rich models, making it perfect for complex commercial projects and cross-discipline collaboration.
Expert Advice on Making the Right Choice
Professional interior designers use practical strategies to select visualization tools. Choosing the right interior design 3D rendering software needs you to look beyond simple feature comparisons.
Start with free tools if you’re new
New digital rendering artists should try no-cost options before spending money on premium software. Planner 5D gives free access to many interior and exterior design elements that work great for beginners. SketchUp also offers a free version that hobbyists and students love. This lets designers build their skills without worrying about money.
Coohom stands out as a great starting point with its easy-to-use interface and rich design resource library. These free platforms pack enough features to handle simple visualization needs well.
Use AI tools for early-stage ideation
AI-powered tools have revolutionized how interior designers start their projects. These technologies boost creativity and make the design process quick and natural. Designers can play with different styles, materials, and layouts without much effort.
Interior AI lets you start with a photo of your space and creates redesigned versions in your chosen style within seconds. Your AI renderings will turn out better if you provide exact measurements, photos, and clear descriptions.
Balance cost with long-term value
You need to understand pricing models before investing in software. Programs come with either one-time purchases or subscriptions that run monthly or yearly. Some users might get better value from educational or enterprise licenses.
Budget-friendly options need careful review of their limits. Software restrictions or compatibility problems might add extra steps to your workflow, which could cost more time than premium versions. Different subscription tiers help designers find packages that fit their needs and budget.
Check community support and tutorials
The software’s community resources matter more than anything else. A strong user community and complete tutorials are a great way to get help with problems and learn new techniques. Active forums create spaces where users help each other solve problems.
Online resources and expert support mean help is always there when you need it. New users benefit from clear documentation and community help as they learn these complex rendering tools.
Best Practices for Using 3D Rendering in Interior Design
3d rendering interior design practices raise both the visual output quality and client experience. The right software selection and strict methods will give optimal results throughout the design process.
Create a consistent workflow
A structured approach forms the foundation of successful interior visualization. Design experts usually start with client brief submission that has requirements, references, and design specifications. The next step creates preliminary “clay renders” (grayscale images without textures) to confirm dimensions, furniture layouts, and camera viewpoints before detailed work begins.
The designers apply textures, materials, and lighting effects to reshape these preliminary models into photorealistic visuals after layout approval. Professional results demand final renderings in proper resolution—often 4K—though designers can adjust based on project requirements.
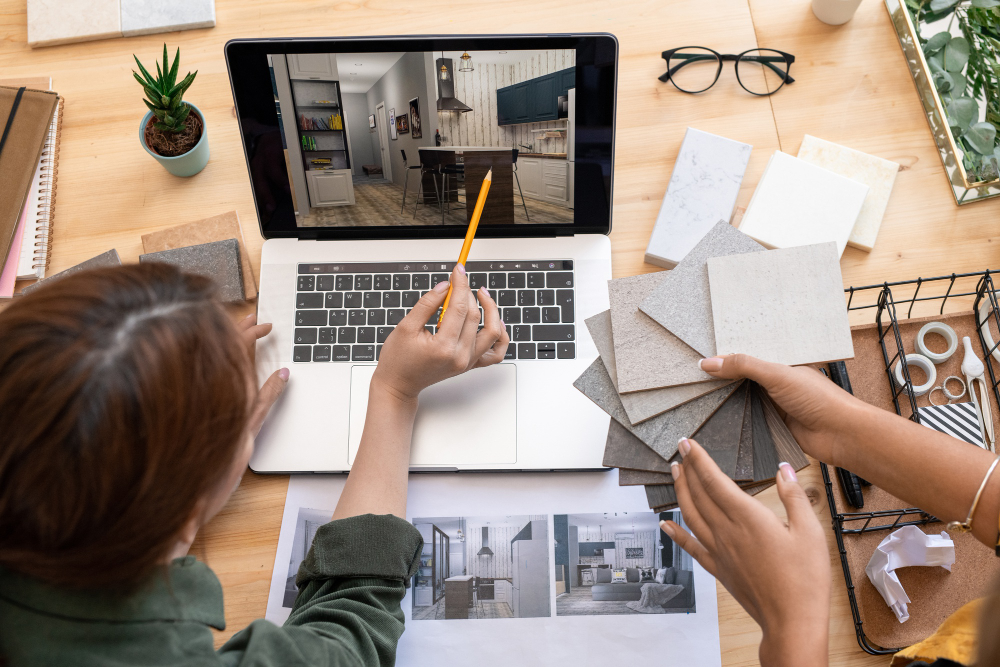
Use rendering for client feedback
Interior design renderings work as powerful collaboration tools. We used them to help clients visualize spaces, textures, colors, and lighting before implementation. This visual communication removes any confusion that might come from verbal descriptions or simple sketches.
To get effective feedback, designers should:
- Present rendered images in formats available to clients
- Use collaboration tools like Trello or Asana for direct feedback
- Keep regular communication during revisions
- Document all suggestions systematically
Client consultation throughout the design process results in higher satisfaction and fewer revisions. Rendering becomes the channel through which clients can see their concepts take shape.
Incorporate VR or walkthroughs when possible
VR has changed how designers present interior concepts fundamentally. VR technology lets clients experience spaces before construction and walk through rooms to learn layouts from all angles. This immersive approach cuts down misunderstandings and speeds up decision-making.
Interior designers note that VR technology reduces design decision iterations. Even basic VR implementation saves time during project’s early stages by avoiding long explanations in presentations. Virtual walkthroughs help clients grasp spatial relationships better than static images and bridge the gap between technical visualization and real-life experience.
Conclusion
Conclusion
3D rendering software’s digital transformation has altered the map of how designers envision, present, and execute their creative visions. The right software makes all the difference between basic presentations and stunning, client-converting visualizations. Designers should think over their project types, technical skills, and desired output quality before they commit to any platform.
The best 3D rendering software strikes a balance between powerful features and ease of use. Immediate rendering capabilities, detailed material libraries, accurate lighting simulation, and cross-platform compatibility are the foundations of effective visualization tools. High-end options like 3ds Max with V-Ray deliver exceptional photorealism, yet beginners might succeed better with intuitive alternatives such as Planner 5D or Homestyler.
Expert designers suggest starting with free or lower-cost options to build basic skills. On top of that, it helps to employ AI-powered tools during early ideation stages to speed up the design process and expand creative possibilities. All the same, professionals must weigh immediate cost savings against long-term value when picking their main visualization platform.
Software selection aside, a consistent workflow helps deliver professional results. Structured methods that include preliminary clay renders, systematic material application, and regular client consultation create superior outcomes with fewer revisions. Virtual reality walkthroughs have revolutionized client presentations by offering immersive spatial experiences that flat images can’t match.
3D visualization’s digital world keeps changing faster, with advances in immediate rendering, material simulation, and artificial intelligence that reshape what designers can achieve. Staying flexible and open to emerging tools will help interior designers compete better in an increasingly digital profession.